What an honor to be interviewed for Garden Design magazine's spring issue. I love Garden Design's gorgeous and ad-free reinvention, and it was such fun to discuss one of my favorite topics, veggie gardens! I (Rebecca) am an aspiring vegetable garden aficionado. I have planted an edible garden for years, but am only beginning to comprehend the depth and complexity of growing food. Maybe I will feel like an expert in another lifetime or three.

Our vegetable garden, circa 2004. Photo courtesy of Robin Bachtler Cushman
Time and experience in any garden will teach a few lessons, however, and I have developed a few tricks and techniques that would have been very helpful in my first gardens. The Garden Design article mentions two key concepts and now, I'd like to share a little tool that has drastically improved the success of my seedlings.
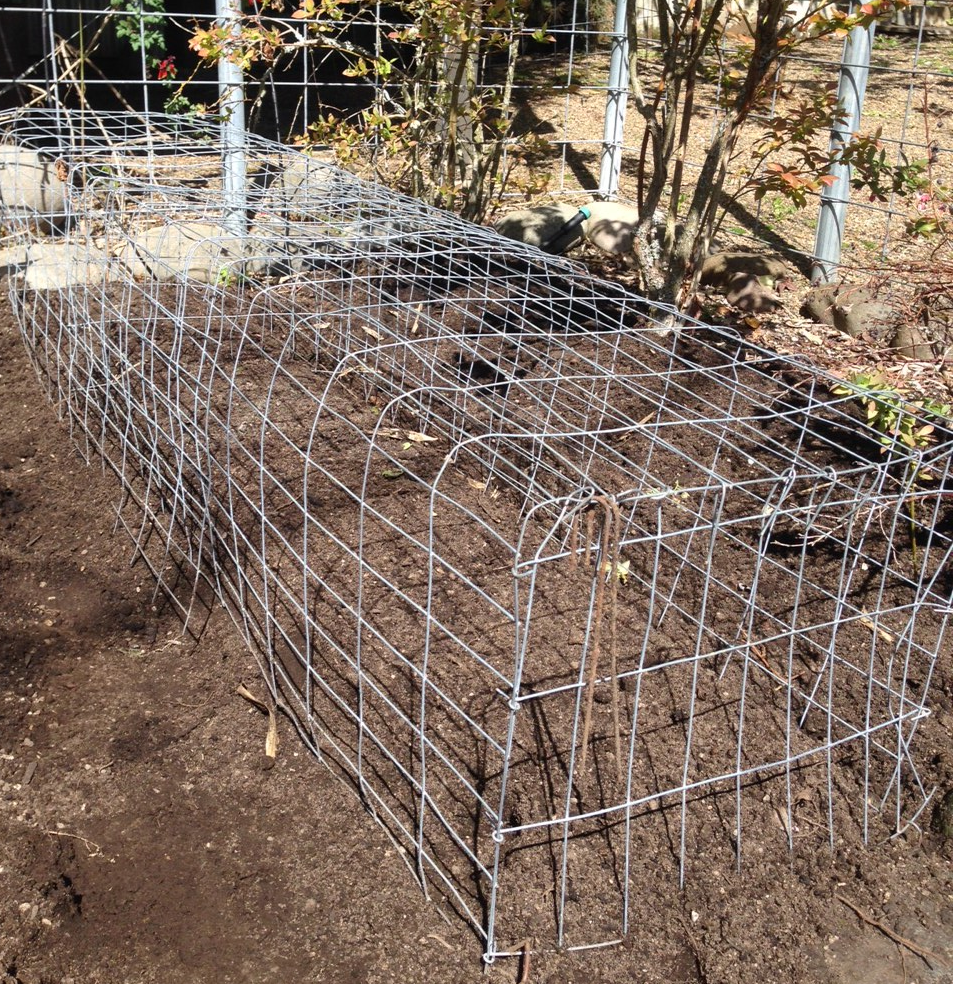
A dog, cat and racoon deterring cage for vegetable seedlings.
Vegetables love organic fertilizers and we have had especially good success with fish bone meal. Unfortunately, urban critters love bone meals as much as the plants do. Racoons, cats and dogs are very attracted to the smell and will dig up a patch of freshly planted veggies in seconds. Other organic mixes were not as successful in our garden, so we decided that our best option was to keep the critters out. Without further ado, here are DIY instructions for simple bent wire cages that will defend your organic veggies from intruders for years to come.
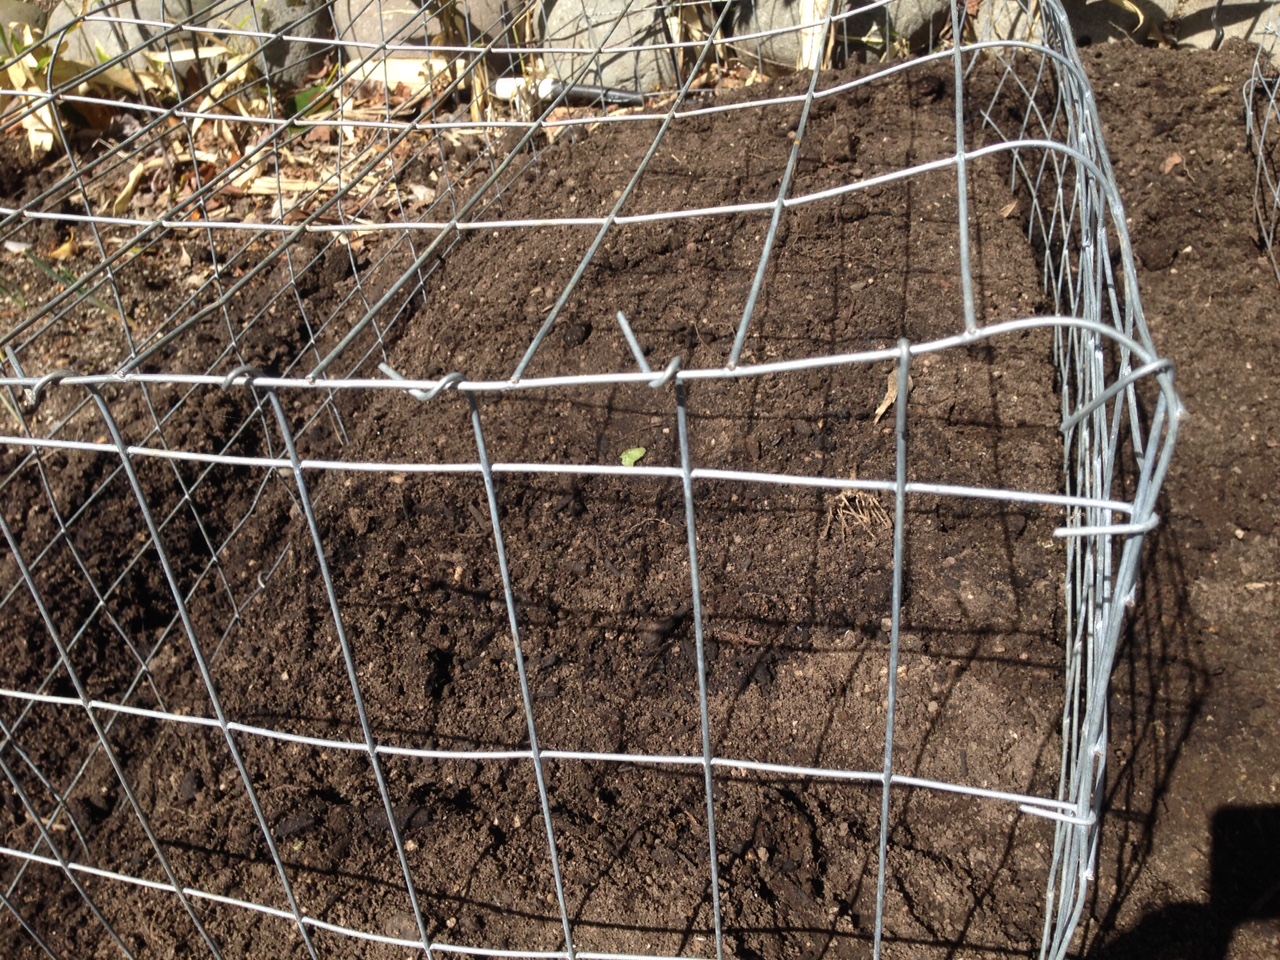
The end of our wire veggie cages. Note the "loose ends" of the end panel wrapped around the main panel.
What you will need: a roll of flexible welded wire (we found ours at the farm supply store), some pliers and wire snips.
The how-to:
- Determine the desired height and width of the cage.
- Snip a panel of welded wire that is equal to two times the height (the future "sides" of the cage) plus the width.
- Bend the cut panel along the two corners, to make the body of the cage.
- Measure the openings on the end and cut out small panels that are slightly larger than needed to cover the ends.
- Bend free wires from one panel around the edge of the other panel (see image). You could use another, more flexible, wire or zip ties for the same effect. In this case you can cut the edges to size, or as close as will allow a full-length wire on all sides to brace your ties.
- Last, but not least, deter stronger and more determined animals by staking the edges of the cages with wire irrigation stakes, called J hooks or U hooks, depending on shape. We remove the cages about a week after our last application of animal-attracting fertilizer, but those of you with particularly nosy or persistent intruders may want to wait a bit longer.

We use J hook irrigation stakes to secure the veggie cages against more determined animals.
And a bonus idea for varied row lengths: Our beds vary in size, so we built small cages that would work for the shortest rows, as well as extension cages that are open on one end. You can place the open end of the cage over a short cage or another extension to make a longer protective cover.
The cages can also double as low cloche frames for cool season gardening.
If the critters have been raiding your starts and seedlings, give these cages a try. Ours have consistently deterred dogs, cats, racoons, even after a generous sprinkling of fish bone meal. It's safe, humane and our veggies always get off to a great start.
If you enjoy vegetable gardens, we have a big and, we think, exciting veggie garden project to share in a couple of months. Stay tuned!

Vegetables from our home garden, summer 2014