Rock On: Stone 101 - Mosaic Newsletter #9

Happy July!  It's a busy time of year for Mosaic, but we've managed to add quite a few ideas and photos to the journal since the last newsletter.  We discussed everything from our visit to the Ruth Bancroft Garden, to selecting containers for planting, to gardening with feathered and furry friends in mind and much more.  Be sure to scroll through the journal when you're done here!

Stone is an essential element in much of Mosaic's work.  One of our main reasons for being a design/build company is the intricate connection between form and function, and nowhere is this more important than in stonework.  This newsletter shares some of the lessons gathered in years of working with stone. Whether you're an aspiring DIY stonemason or looking for the right pro to help build your hardscape, we hope this article will bring some inspiration and direction to your search.

Stone Design and Selection

When designing a garden, setting the overall layout of the hardscape is our first priority.  Whether we're creating scaled drawings or just hand-waving, we seek to create a unified plan that balances the desired feeling of the garden with the limitations of the site, such as grade, dimensions, and relationship to the house.  We try to design an entire space, say a front yard, at once, even if we only intend to build a portion of it immediately, so that we can be sure that the first phase ties into the following phases.  We save all materials decisions until everyone is happy with the overall layout of paths, patios, walls and borders.

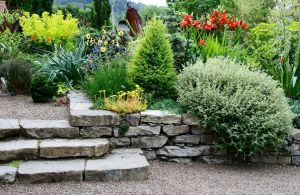
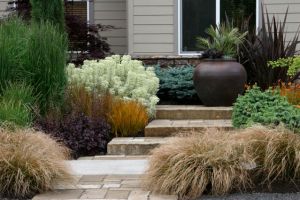
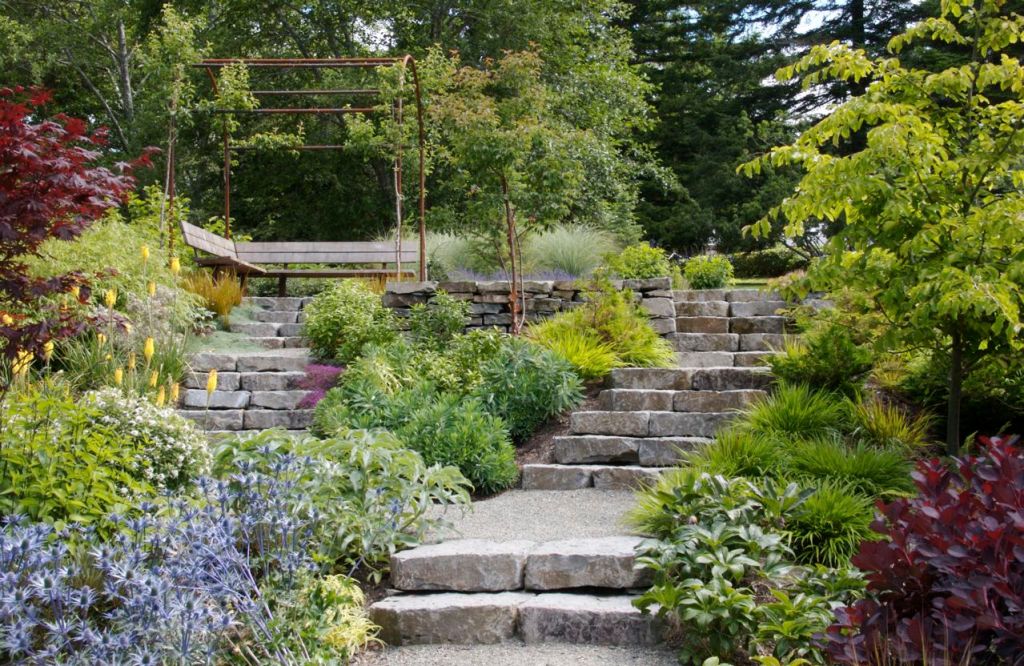
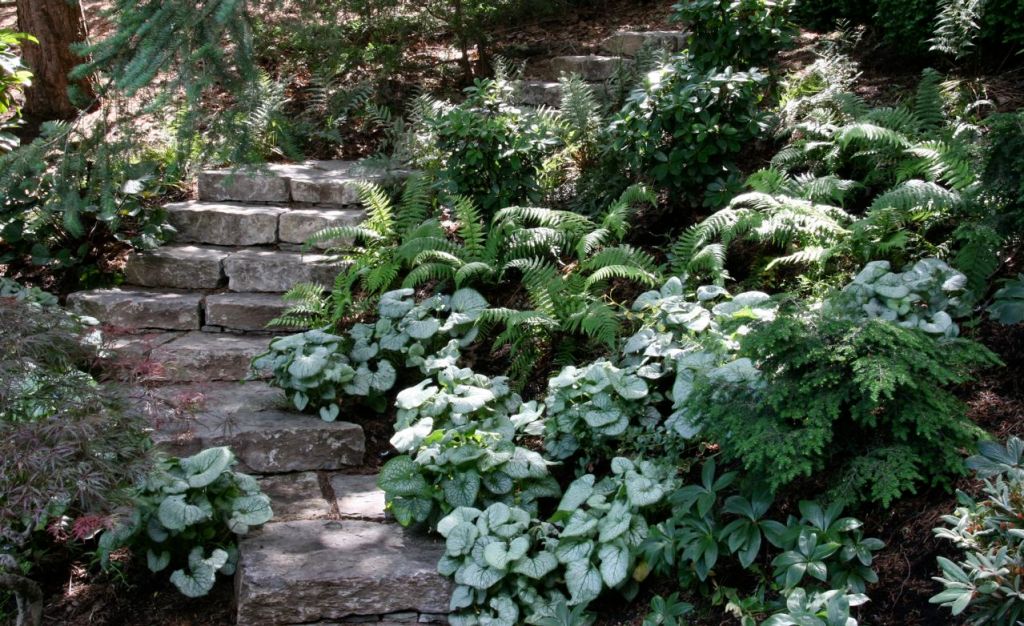
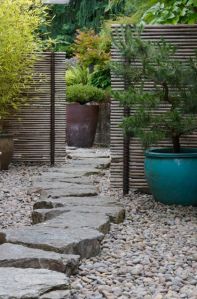
Once the general design has been set, decisions about which stone to use often fall into place.  Aesthetic preferences play a big role, but the stone's desired function comes first.  On important pathways, we generally select a very flat stone, with few surface irregularities to catch high heels or make less able visitors uncomfortable. A stone with a regular surface is a good choice for most patios, as well, as it is easier to de-wobble tables and chairs on a flat surface than one with more bumps and dips.  Of course, a rougher stone can a beautiful choice for many spaces.  In some gardens, we use a rougher stone in secondary paths, and a flatter stone for primary entrances and paths.  If your heart is set on a rougher stone look, there may be a way to use it if you're careful in selecting, laying out and setting each stone.  In our garden, we wanted to find a single type of stone from the Pacific Northwest that could be used for paths, walls and stairs - a tall order!  At the entrance to our garden, we have a very few steps of the slightly rougher basalt that we chose, but we hand picked the best possible stones for each step.

While a stone may look perfect in photos or at the stoneyard, no natural materials just fall into place, and some are a major challenge for a novice stonemason.  Regularity of shape and surface, workability and average size vary between varieties of stone, and each characteristic presents its own challenges and opportunities.  Average size is a good example.  Small stones are easier to move, but they are more difficult to stabilize.  Discuss your options with the knowledgeable folks at your stoneyard.  Be honest about your skill level, the amount of time you can dedicate to the project and the tools you have or are willing to rent or buy (some stones can only be cut with a big, heavy, gas-powered wet saw - not for the faint of heart!).  Don't be offended if they suggest that you consider a man-made product, as those options are quicker, lighter, and all-around easier for the first-timer.  That said, we've seen some pretty darn good natural stonework by amateurs who were willing to dedicate the time and attention to detail their stone demanded.

Once you've taken function and ease of construction into consideration, you may still have a few stone options for your project.  Color is an obvious consideration, but don't forget to consider other attributes, such as the regularity of the pattern, the general size and texture of the stones, and the materials and colors of surrounding features, such as your house.

Goals

"When I start building, I don't set out to make a beautiful wall.  My intention is a lasting structure.  Throughout the day, I apply my efforts to the basic principles of drystone construction.  If I follow them successfully, I'm likely to leave behind a pretty good-looking wall." - Dan Snow

In our opinion, really good stonework has a few recognizable attributes.  If your work (or the work of the contractor is considering) shares these characteristics, you're probably on the right track:

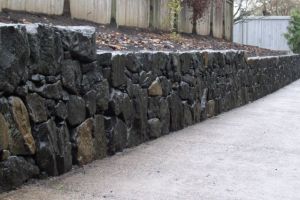
  • Base - Every stone project requires a solid foundation.  In most cases, several inches of compacted sharp gravel is a good start, but discuss options and additions for your particular stone project.  We often spend hours preparing our site before we lay the first stone, from setting the grade to excavation, moving base, grading, compacting, grading, compacting....  There is an unfortunate proliferation of "expert" advice floating around that claims you can more or less plunk stones on essentially unprepared soil.  Ahem.  Don't.  Unless you're just not interested in the long term longevity of your work, do the base work.
  • Careful layout - String lines are your friend.  They make sure that your straight lines are actually straight, keep you at the right grade, and make for impeccably level walls.  Make sure that water runs away from any structures and that the slope of your paths or patios are appropriate for their purpose.
  • Tight gaps - We know of no better visual indicator of quality than consistently tight gaps in stonework.  By taking the time to shape and place stones so that they leave little room between them, you lock the stones in place, creating a longer-lasting, stable product that is pleasant to walk on and beautiful.  There are moments when a "stepping stone" effect can be nice, but we reserve this option for infrequently traveled areas.
  • Stability - The wobble test.  Even the best stonemason may have to re-stabilize a flagstone or two after their work is done, but the vast majority of stones should not move underfoot.  Borders and the top stones of walls should also be firmly set.
  • Dry setting - We rarely use mortar in walls and never in laying flagstone.  Any good stonemason's work, mortared or not, is grounded in careful dry setting technique.  Sometimes using mortar is preferable or necessary, but good, stable stonework should still be the foundation of your project.
  • Time - The variation that makes natural stone so beautiful also demands thoughtful, sometimes slow work.  Each stone requires a different approach, with an eye towards not just fitting into its space, but making the right platform or hole for the next stone.  The rewards come slowly, but they do come, and, in the long run you will be happier with a well-built project than a quickly built one.

(Re)Sources

Dan Snow, the New England stonemason quoted in the "goals" section above, offers a much better and lengthier source for "how to" information than we can provide in our journal.  His book In the Company of Stone is both a gorgeous collection of stonework photos and an invaluable resource.  If you have a moment, check out his website and Flickr stream for lots of neat process photos.

We can't recommend Lane Forest Products highly enough.  They are a great source and resource for your stone projects, and they offer a great selection of materials for any project.  Their stone yard crew is pleasant and professional, even in scorching heat, and we're always happy with the quality of their products.

Last, but, we hope not least, we've put a small sampling  of Mosaic's stonework and a slideshow of the construction of a dry stack wall (rerun from this post) below.  See if we measure up to our own standards!  Click on the images in the gallery for a closer look.

[gallery link="file" columns="4" orderby="title"]

[slideshow id=3458764513843874476&w=426&h=320]

It's Hot.

Phew!  Yesterday was a scorcher, and it looks like we're in for another hot day today.  The plants are a little shocked, but we wonder if the long, slow early growing period might have toughened them up a bit.  While we wait and see, here are three tips for beating the heat... in your garden, anyway:

  • A quick blast of water in the heat of the afternoon cools the plants and hardscape down a bit.  With our cool nights (ahh, those cool nights), we only have a few really broiling hours, and a little cooling can go a long way towards preventing burned leaves and miffed plants.  It's still best to do your main watering in the early morning, but a couple of minutes of well timed water in the afternoon can be a big help.
  • Plant a few summer performers that actually enjoy a little heat.  These plants may take awhile to come on strong, but they love the weather we're having right now, and will thrive through fall.  One annual we love is Solanum pyracanthum - a sort of mean-looking spiky tomato.
  • Resolve to work towards a lower water garden.  Drought tolerant plants tolerate heat better than their hydrophilic counterparts, and you don't have to water them every day in a hot spell to keep them from collapsing completely.

Enjoy the heat, if you're a heat lover, and happy hiding if you're not!  We're still working on your newsletter.  We're sharing some tips and ideas for selecting and working with stone, and we think it will be worth the wait.

For the Birds

Some of our favorite garden visitors are birds.  The garden moves with their hopping, fluttering and bathing and their songs and twitters are a soundtrack for our work.  Part of the fun of watching birds is that you never quite know what they'll do next.  Yesterday, Buell saw a jay dive into our stock tank pond and paddle around, hop out for a moment and then do it again!  Kniphofias are usually a hummingbird thing, but two years ago, waxwings mobbed our Kniphofia northiae flowers.

There are a few plants that bring birds back year after year.  Many of them are well known, but here are three of our favorites that may not make the common lists.

  • Sambucus - Our 'Black Beauty' flowers and fruits reliably, and is absolutely covered in waxwings when the berries are ripe.
  • Eccremocarpus is a red-flowered vine that is a hummingbird magnet.  We can work and watch just a few feet from the vine in our veggie garden, and the hummers are too happy to mind.  If you thin the seed pods, you'll find that the vine flowers through the entire growing season (if you don't, you may find a few baby vines spread around your garden...)
  • Salvia guaranitica 'Black and Blue' proves that hummingbirds aren't complete color snobs.  Its deep blue flowers vibrate with hummingbirds throughout the summer.  Interestingly, we've found that while newer plants will die in a hard freeze their first winter or two, established plants survived even last year's serious cold snap.

A last word on birds: our native bird populations are dwindling, particularly the species that forage on or near the ground.  There are many, many reasons for this, and there are many ways to help.  Planting bird-friendly gardens and using few or no pesticides (organics first, please) are a great start.  As far as the birds are concerned, the more bugs the better!  Another thing you can do is to bell your cat or find another way to minimize their bird kills.  We love cats, but a few of they are not native to our area and the native birds have not evolved the tricks to escape their efficient hunting.  We also minimize cat (and raccoon!) traffic in our garden by netting off their favorite pathways and blocking off the gaps under our fence.

ColorTextureForm - Mosaic Newsletter #8

Howdy!

We hope our last newsletter was helpful in your spring garden work.  If you haven't checked in since then, we expanded on our spring cleaning theme with a little about gardening tools, ideas for growing food in busy lives and tough spaces, and tips for making a beautiful garden scene. Beyond those ideas, we've posted some neat photos, a winter post-mortem and more, so be sure to scroll through the journal when you're done.

In this newsletter, we'll discuss how we use color, texture and form to select and place plants in our gardens.  The terms color, texture and form are used together so often in articles, books and lectures about planting design that they are almost cliche, but what do they mean for your planting design?  Even a quick survey of online articles shows a huge variety of ideas for designing with those terms in mind.  While one designer may prioritize flower color and structure, another focuses primarily on the texture and shape of leaves.

In our work, color, texture and form carry equal weight, and we have strong ideas about the best way to see and use each one.  We select our plants to create a cohesive palette, sometimes subtle, sometimes high-contrast, that reflects the desired style and mood of the space.  Because the possibilities are endless, and the results should reflect you and your aesthetic, we will focus on how we think about color, texture and form, leaving the nitty-gritty fun of building a palette to you.

Color

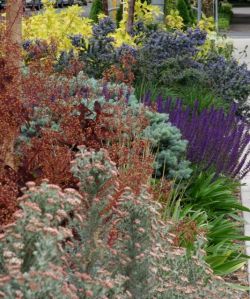
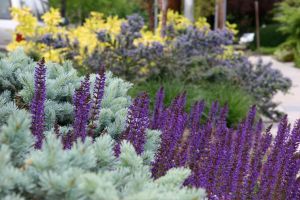
Foliage first - While flowers are fun and part of almost every garden, foliage color is the foundation of our plant color palette.  We use foliage to create sweeps of color throughout the year, or at least the growing season.  The colors vary from bold, contrasting spots of yellow and purple to accents of silver and burgundy to shades of green.

Know when to hold 'em - Even in a bold palette of strong, bright colors (restraint does not mean boring), restraint is key.  We intentionally leave out some colors or save them for another area.  If you love every color, or are the sort of person who can't leave a good plant at the nursery, try using different palettes in different areas of the garden.  As you can see in the first photo, our front garden has lots of bright, hot color, while the side garden, at right, tends toward gentler pinks, blues, creams and whites.

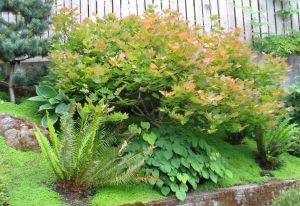
What are we talking about here? - What we mean by "form" is the overall shape of a plant - upright, round, conical, weeping, arching, and so on.  Sometimes form and texture overlap, as in spiky plants, like iris and Phormium, but for the most part, form has more to do with outline than texture.

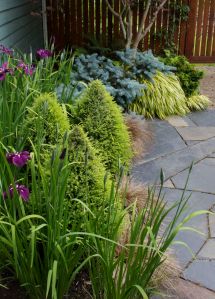
Round, rounded, roundish - Every plant has a form, and some are stronger than others.  Not all strong forms are geometric, but those are the easiest to discuss.  For example, lots of plants have what we call a "roundish" form, where the outline more or less radiates around the center.  Other plants have a more perfectly rounded outline.  Picea sitchensis 'Papoose,' for instance, is almost spherical.  A stronger form makes a stronger statement in the garden, and can be used as a structural, almost sculptural element in planting.  We will shear some plants, like boxwoods and fine foliaged conifers, to tighten and perfect their form.

The dance - In many of our gardens, we select a plant with a strong form and "dance" three to seven of them through a layer of lower plantings.  The repeating, usually evergreen, forms have room to shine, while the lower plantings add seasonal contrast and interest.

Another perspective

Not all designers think alike (thank goodness), and if you are seeking a different, nuanced, and perennial-savvy take on color form and texture, we highly recommend designing with plants by Piet Oudolf with Noel Kingsbury.  Oudolf's sensitivity to tiny differences in, say, flower shape helps him create ever-changing, intricate, romantic plantings.  What an inspiration....

That's all for now, folks!  We'll be back over the coming weeks with more ideas and, everyone's favorite, new photos, so please check back soon.

More Spring Cleaning - Make a Scene

In this final follow-up to our Spring Cleaning newsletter, we  offer ideas for creating compelling scenes or views in your garden, with the goal of making the space more attractive and engaging.  In keeping with the theme of developing gardens, we'll focus on ideas that work with smaller additions and changes here, but a taste of the larger possibilities of this concept can be found in our newsletter about features, among other places.

The most important part of creating a view or scene is to consider the viewpoint.  Whether we're working on a new or existing garden, on a large or small area, we return over and over again to the pathways, windows, doors and other areas from which the space will be seen.  We can all get lost in our own perspective while working in the garden, looking at a planting or other element from right where we're standing - even if we're in the middle of a planting bed!  Take a walk around the area you're working in, pausing at the important viewpoints, considering how changes will appear from each location, and prioritizing the most used points and pathways.  Be sure to repeat this routine often through design and layout,  as the view will change with each new element (or sometimes just a change in light).

Creating or enhancing a central focus is the first tangible step in creating a view.  Whether you're adding a hard element,  planting, or hardscape, consider that any of them will be balanced by your plantings.  Substantial, simple elements will ground your view, where smaller or fussier elements might be lost.  A few ideas for eye-catching elements for your scene are:

  • Specimen tree with beautiful form (go see the Baltzers!).  You may be able to use or improve on an existing specimen in your garden
  • A series of three or five striking conifers or other evergreen (sheared boxwood?)
  • Bench
  • Ceramic urn, planted or unplanted
  • Basalt bowl
  • Stone stairs or path

Even small changes deserve a solid foundation.  Building a base of compacted gravel and leveling your hard elements will make a big difference in their effect and usefulness.  Don't hesitate to move or remove plants or other elements that will detract from the long-term goal.

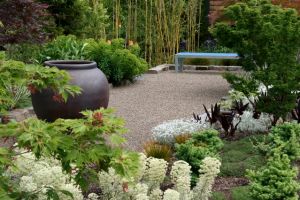
Whenever possible, we like to bring the finishing plants for a space after the primary elements are in place.  Often the best ideas for finishing the scene we're creating comes  late in the process.  Although the urn in the photo at right was a beautiful element on its own, we didn't think of the forehead-slappingly obvious addition of a big, blue hosta until after it was in place.  You can contrast or echo the color and form of your central elements, but be sure not to bury them in oversized plants.

We hope our ideas for spring cleaning have brought a little fun and inspiration to your garden this year.  We're working out of town this week, but we'll be back soon with the next newsletter and more ideas for your space.

More Spring Cleaning - Tools of the Trade

Good tools can make developing a garden a joy, rather than a chore.  Through years of work in gardens, we've developed our ideal tool box, as well as some strong opinions.  It seems like sharing some of our favorite tools, as well as some tool-keeping advice is a great follow-up to the last newsletter's ideas for improving not just your garden, but your gardening.

Before we get into lists and suggestions, we should stress that the most important part of selecting tools is how they feel to you.  Take the time to handle the tools and move them more or less in the way that they will be used.  The best tools for you will feel balanced, comfortable and relatively light in your hands.  A heavy, unbalanced tool will cause you more fatigue in repetitive tasks, which means the job will take longer and be less fun.

Long handled tools

The shovels, rakes and implements of destruction at right are just a few of our favorite long-handled tools.  We have selected each one for its dedicated use, hand feel and sturdiness (given proper use - more on that in a moment).  We find that wood handles offer the best balance of comfort and durability for our home gardening.

Note that the t-handled tools in the photo are not for the sort of multi-taskers who are likely to pry at rocks or stubborn roots with whatever tool is most handy.  They are perfect for their jobs, but they will break under improper stress.  If you're a pry-er, look for indestructible versions.

  • Sharp-shooters / perennial spades - these are from De Wit, and we know of no better tool for planting perennials.
  • Pointed shovel - nothing special, other than careful attention to hand feel
  • Wire rake - gentle on plants, excellent for raking gravel
  • Compost fork - perfect tool for moving loose mulch or compost into a wheelbarrow (something we've done a lot of lately).  Note that is quite different from a digging fork.
  • Flat shovel - for scooping soil, the edges of the mulch pile, and other loose material.

**Special request - if anyone finds this (exact) compost fork or flat shovel, please let us know!  We have other versions, but these are our favorites.

Small tools

Smaller tools should be just as tough as your larger tools, so choose wisely.  Our small tools get many, many "miles" in a year, but we can't recall replacing any of them.  And, just in case it's not obvious, we never use power cutting or hedging tools to shape or prune plants.

  • Pruners - or secateurs, if you're an Anglophile. Almost every great gardener we know uses Felcos, and we're no exception.  Be sure to try a couple of styles.  Both of us find the F-6 style, for smaller hands, to be the most comfortable.
  • Loppers - those giant, long handled pruning tools are great for bigger branches.

  • Shears/hedge trimmers - for shaping shrubs, conifers and anything that benefits from a haircut here and there.  Can also be handy in cutting back grasses and perennials.
  • Saws - we have a selection of smaller hand saws with different blades and handles.
  • This little pointy thing - pictured at right.  The F20 Dutch Perennial Planter, also from De Wit, is unbelievably useful for weeding and planting small perennials and annuals.

Other handy tools

Of course, the list goes on and on, but there are a couple of other tools that we use too often not to mention.

  • Wheelbarrow - not all wheelbarrows are created alike.  Look for a wheelbarrow that's light enough to maneuver easily or even lift, and small enough to weave in and out of plants in a bed.  Most wheelbarrows are too big and heavy to be useful for many tasks.  If the frame allows you to move over ledges or stairs, all the better!
  • Gloves - we're big fans of Nitrile garden gloves.  Before we found these, we had to remove our gloves for weeding or other tasks that require good hand feel.  Now we can weed and even tie knots with our gloves on!  They're available almost everywhere and they can handle several trips through the wash.
  • 5 gallon buckets - the perfect size for toting materials in and out of tight spaces in the garden.  Unlike larger containers, you don't have to leave them in the paths, while you run in and out of the beds.

Care and feeding

The right tools are a wonderful asset, and with a little TLC, they will perform beautifully for years, if not decades.

  • Sharpen!!! - *the* most overlooked, easy-to-fix issue most gardeners have.  Not just your cutting tools, but your shovels and sharpshooters will dramatically benefit from a regular sharpening.  We run an angle grinder with a metal blade across them several times a year (at about a 45 degree angle).  A good blade on your pruners or your shovel, will make old tools work like new again.  This is so important, we're putting it in red. ; )
  • Keep them dry - nothing kills tools, especially hinged tools, faster than being left out in the rain.
  • Oil the hinged tools - a little WD40 will make those old Felcos feel like a million bucks.

We hope these ideas will help you make the best of your gardening toolbox, and, in turn, make gardening a little more productive and fun this year.

Spring Cleaning - Mosaic Newsletter #7

The weather can't seem to make up its mind right now, which must mean it's spring....  Clear and warm!  Wind and rain!  Snow in the hills!  Hail and sunshine!  No matter what the weather brings, lengthening days and budding plants draw gardeners outdoors.  Once we've caught up with the weeds, pruning and other chores that keep our garden and our clients' gardens tidy, we turn our minds to improving the spaces.  In this newsletter, we offer a few of the core concepts that help Mosaic develop, rather than just "maintain," new and existing gardens.   Over the next few weeks, we'll post more ideas that might improve your garden while making gardening a bit more fulfilling, so check back at the journal!  [Edit: Idea #1 - Tools of the Trade]

iSubtraction

For many gardeners, spring brings opportunity to add to their gardens - all those colorful, promising pots at the nursery, a piece of garden art, or that new idea from Sunset.  For us, it's the perfect moment to subtract.  We look for plants that are overgrown, declining in old age or are just-not-right, and off they go to a new home or the yard debris bin.  One of our greatest design assets is our willingness to start over, on one plant, a whole bed or a whole garden.  There are almost always better solutions waiting to earn their place in a garden.

Subtraction doesn't need to stop in your planting beds,  Our clients are amazed at how much better their yards look after the demolition phase, when we've removed not just non-performing plants, but low borders, unnecessary hardscape, and crumbling garden art.  While "demo" doesn't need to be extensive, an empty palette is a relief and an opportunity to create a better, simpler, more beautiful space.

iSimplify

"Sometimes you have to think and think to get something simple" - Ron Lutsko

Filling a hole in a bed can feel a little daunting.  In our plantings, we've don't look far for our first ideas.  We consider what plants in that bed, or similar nearby beds, are thriving, and work from there.  Often, we're able to incorporate and expand on a nearby success story.

In new beds or just filling in, planting in groups of three to forty creates a coherent, rich palette with the added bonus of lower maintenance.  You can create waves of year-round color and texture by selecting the best performing plants for your space.

Beyond planting beds, we believe in simple features and clean, strong lines in the hardscape (a concept that needs its own newsletter or three).  Simplifying the "hard" elements of a garden doesn't require a complete remodel, however.  Most spaces have elements in which a little simplification would go a long way.  The edges of lawns are one place to consider. Could a straight or curved line make the lawn a simpler, more pleasing shape?  What if you were to cut out that  peninsula of sod, and connect the surrounding beds?

Consider paring down or reorganizing anything that adds clutter to your space.  From pots to garden ornaments, we sometimes just have too much stuff.  Did you know that some good gardens never make it past the magazine editors, because they have too many little distractions in the beds, around the seating areas and everywhere else?  Removing a few things and concentrating others into an higher impact feature will focus attention on the best parts of your garden, rather than distracting from them.  The collection of pots in the photo of our bench, below, "works" because we clustered them together at an important spot.

iMake room for people

We often describe ourselves as a garden design/build company, but we really think of ourselves as creating outdoor spaces for people.  Building a space that lets you, your family and friends spend more time in your garden is our primary goal.  Of course, building a comfortable, human scale space can be a major undertaking, but it can also be as simple as improving a path, so you walk through the garden more often, or adding a bench with a pretty view.  We have many ideas about creating seating areas and other people-friendly spaces, but the fundamentals are simple:

  • Comfort - make sure seats and benches are comfortable, substantial and stable.  Take time to level the seats and their foundation.
  • Breathing room - broad paths and open seating areas are more inviting and don't get lost in the summer jungle.
  • Quality - do your homework and prep work before laying a path or any hardscape.  Solid footing is vital, as unstable, uneven surfaces can keep people away.

iA little less water goes a long way

When we first planted our garden, we gave our plants a running start with great soil, a little food and plenty of water.  As the plants established good root systems, most showed little stress in hotter, drier periods.  A few plants, however, would wilt and crisp at the tips if we didn't increase the irrigation.  For awhile, we watered enough to keep those plants, if not happy, then not miserable or dead.  But somehow it didn't feel right to irrigate an entire garden to accommodate a few plants.

Eventually, we decided to water less frequently.  If an established plant couldn't handle the drought, it died or found a new home.  Today, our garden is full, diverse and lush, and we're thrilled to use a little less of a precious resource.

We wrote about using less water in another post, which we hope you'll read, but the concept is simple.  Most of us water more often than most of our plants require.  Try waiting an extra day or two between watering cycles this summer.  While a few plants will decline, you will probably be surprised at how many plants are up to the challenge.  You may even find that some plants, like ornamental grasses and some conifers, prefer less water.

Thanks for reading!

We hope we've offered a little inspiration for your spring cleaning.  Over the next few weeks, we will share a few more ideas for developing your garden, so stay tuned.  If you're ready for more ideas now, take a look back at our fourth newsletter.  Spring always brings lots of ideas, photos and news, and we look forward to sharing them with you!

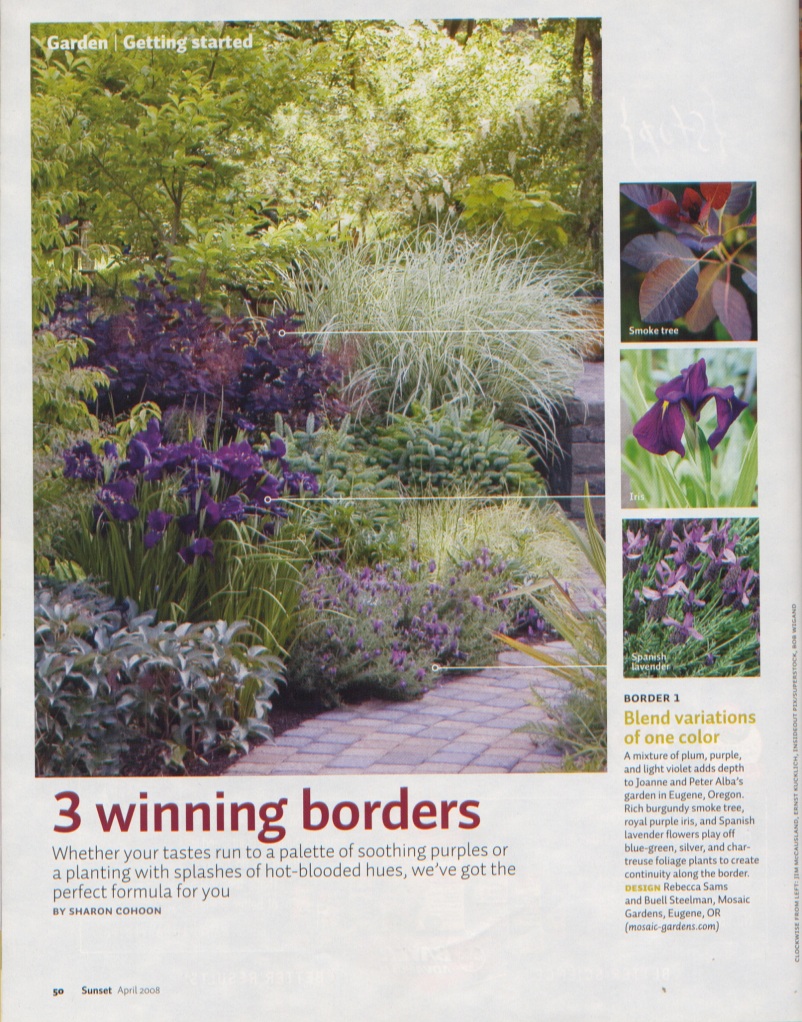
Mosaic Q&A - Sunset April 2008 Border

Have a question? Want more frequent updates? We’d love to hear from you! Read more here and/or write us in the comments or at mosaic@mosaic-gardens.com.

A question from colder climes:

I cannot tell you what an inspiration the border [featured in the April 08 Sunset] has been for me! I am writing you to find out what the other plants are besides those listed in the article. I live in Northeast Wyoming do I imagine some will not work in our zone, but I will try to find similar color or texture matches for our garden.

Thanks! We've included a scan of the article and a plant list below. While some of the plants shown are not hardy in a cold climate, your inclination to focus on texture and color will definitely help you create your own striking border. When designing with plants, we focus on creating a palette, rather than a plant list. In the border shown in the Sunset photo, purple, silver, cream and white create a simple color palette. The playful feeling of the border comes mainly from the contrast of foliage texture - big Hellebore leaves, arching grasses, spiky iris, soft lavenders - while the spherical forms of dwarf Sitka spruce anchor the space through all seasons. One final idea worth noting is that we used small groupings of plants to create waves of foliage, rather than a jumble of individual specimens. This simplifies the visual effect, as well as the maintenance!

Sunset April '08 photo plant list (all deer resistant in our area):

Helleborus x sternii Iris sibirica (not sure which variety, b/c so many are similar) Cotinus 'Royal Purple' Lavandula stoechas Picea sitchensis 'Papoose' Carex m 'Aureovariegata' Miscanthus s. 'Variegata'

We very much enjoy hearing from you, and we look forward to more questions!

Harvest Season - Mosaic Newsletter #5

Fall harvest

At first glance, the geometric structure required by the way most of us garden (rows of vegetables in rectangular or rectangular-ish raised beds, surrounded by straight paths) may seem limited, but a little thought and creativity offers a range of solutions and feelings from formal and sculptural to whimsical. We consider the necessary rectangular forms and pathways a jumping off point for design, rather than a limitation. Once we've got the basic form in mind, we consider materials for borders or retaining. Stone, metal, and wood all present a variety options for finishing the structure of a garden.

We planted our first veggies before the rest of the garden was complete.

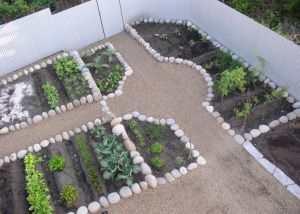
In our garden, the best space for the veggie garden was in a lower, sunny corner of our property. The straight lines of the paths and circular "roundabout" continue the overall design of the ornamental garden, and the pea gravel paths and surrounding corrugated, galvanized fence emphasize an overall continuity of materials. Rather than continuing to use the rough, straight edged basalt that forms the borders, walls and stairs of our ornamental garden, however, we bordered our raised beds in large, round river rock. The river rock softens the lines of the veggie garden, and playfully frames the herbs, strawberries and other low plants that spill over the borders. The aesthetic center of our veggie garden is the Vietnamese urn water feature at the intersection of our main paths. The urn is visible from the upper garden and punctuates the long axis of our narrow space. The circular space around the urn cuts into the straight lines of our raised beds, at once playing off of and playing with the surrounding, mostly rectangular, geometry.

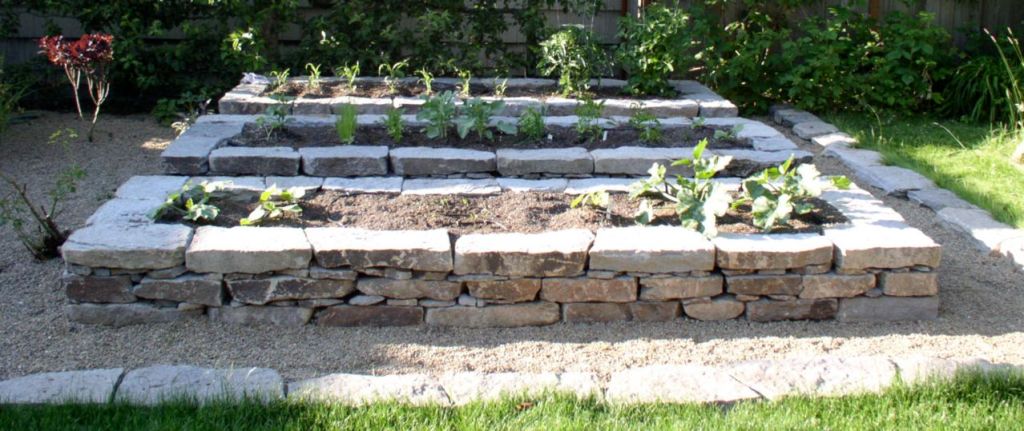
Our space reflects our desires and priorities (cohesiveness of design and maximizing usable space, among others). The veggie gardens we have created for clients vary with their goals. One client was a busy mother with a strong design sense. She wanted to involve her young boys in growing some food, but she was more interested in having a "sculptural" garden that was easy for her and the boys to work than in maximizing planting space that she would not have time to maintain. We built three long, narrow, rectangular raised beds from dry stack basalt. Their unusual forms look great even in winter, and grow gorgeous peppers and other heat-loving crops in the summer.

These long, narrow raised beds are perfect for our client who wanted a small, sculptural garden to work with her sons.

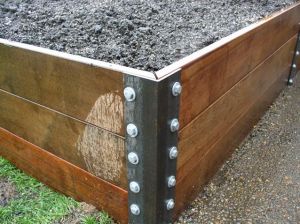
A simple, portable ipe and steel framed veggie box

Another client wanted a simple, contemporary box for their veggies. The catch was their request for a portable design they could take with them if they moved. We bolted ipe (a sustainably forested tropical hardwood) to rusting metal corners, which extended below the wood and doubled as stakes to hold the box in place.

There are so many more ideas and materials to try, and we love the challenges and rewards in designing vegetable gardens. Just the ideas for retaining (vertical flagstone, rusting metal, how about a mini-gabion wall?) seem endless. Each space and lifestyle offers challenges and inspiration for design well outside the ubiquitous cedar box.

iA Little Help

We love growing food. Our veggie garden and orchard take a third or so of our usable garden space, and we dream of having more space to grow all of the things that we can't cram into our little property (brussels sprouts! pumpkins!). That said, our expertise is in landscape design and construction, not in producing food, and what success we have in growing fruits and vegetables is due in large part to research and strategic questioning of farmers and home gardeners many times more experienced and knowledgeable than we are. Below are a few of our favorite resources. We'd love to hear about yours!

One of Robin's photos of the farmer's market

  • The Lane County Farmer's Market and other local farmer's markets - Local farmers know what, when, where and how to plant, cultivate and harvest, and most of them are generous with advice. Two of our favorite farmers at the market are Grateful Harvest and Ruby and Amber's (they cultivate by horse power!). The market is also the place to buy starts in the spring - try Ruby and Amber's tomato starts next year....
  • Growing Vegetables West of the Cascades by Steve Salomon - Everything from planting calendars to best varieties for our area.... This is the Willamette Valley veggie geek's best friend. It has awfully high expectations for those of us on smaller lots, and we would quibble with a few particulars, but our copy is dirt smudged and dog-eared for a reason.
  • Territorial Seed Company - Seeds and starts grown in Oregon, with many organic options available. One of our greatest early season joys is the March delivery of the year's seeds.
  • The Oregon State Extension service - lots of information on fruits, vegetables, pests, and regional differences. We just found this cool pdf with information and planting calendars for different regions of the state.
  • Robin Bachtler Cushman's photographs are terrific inspiration. She chronicles our local farms and vegetable gardens. If you happen to be on the LCC campus before September 21, her work is part of a show, "Markets," at the David Joyce Gallery.

These are just a handful of the terrific local and regional resources, including many exceptional home gardeners who are happy to share their experience and advice with the rest of us.

Thanks for keeping up with us! Fall is a wonderful time to be outside, and we hope the next month brings plenty of beautiful weather for gardening and other adventures.

Best,

Rebecca & Buell

Mosaic Newsletter #4

This time of year, everyone's free time fills with daytrips, summer projects and visiting family and friends. When the beautiful, long evenings roll around, we find ourselves wanting to spend time *in* the garden, rather than *on* the garden. In honor of summer fun and spaces that don't overwhelm us with to-do lists, we've put together a few secrets to creating visually rich gardens that don't require constant attention. We'll also introduce you to one of our favorite shady places to spend a warm, summer afternoon - Baltzer's Specialized Nursery.

The past month has been a busy time for Mosaic, but we've managed to add a few fun posts. If you haven't checked in for a little while, take a moment to check out the cool dry-stack stone wall we built, some tips for lowering water use in your garden, a couple photos of our project at the coast and three of our favorite perennials. If there's anything you'd like for us to discuss, please let us know. We'd love to hear from you!

The big easy - thanks to careful plant and materials selection, prep work and many of our other time saving techniques, this S. Oregon coast garden gives more than it takes.

iSummertime and the Garden's Easy

There's a myth that it takes almost daily work to make a garden beautiful year-round. Some great gardeners love to spend most of their free time deadheading, weeding, pruning, raking and fluffing, but many of us find garden work to become (gasp!) a chore if it takes too much of the time and energy we would rather devote to other pursuits. There's no such thing as a "no maintenance" garden, but in the years we've spent refining our plantings to reflect both the aesthetic desires and the lifestyles of our clients, we have discovered a few ways to create spaces that look great with just a little TLC.

From prep work to plant choices, hard work *before* planting made Joy Gregory's garden easy and fun.

Start from the ground up - Before you plant a new bed or build a path or patio, take time to clear and prepare the site well. Many potential issues, from weeds to poor drainage to wobbly stones can be lessened or prevented by excellent prep work. In our plantings, for instance, we spend much, much more time clearing the site, grading, preparing the soil, re-grading and selecting plants than we do putting plants in the ground. And we never use weed cloth (that could be a whole separate post!).

Think ahead - It's easy to get caught up in the moment, and select a pretty plant or hardscape material that will add to your to-do list in the future. For instance, many people love the pea gravel in our garden, but aren't prepared to do the extensive prep work or raking and weeding required to make and keep it beautiful. For them, choosing a different gravel or hard paving will lead to a lower maintenance and more attractive garden in the long run.

Waves of striking foliage look great year round, while flowers add seasonal color.

Foliage power - If you select plants for the color, form and texture of their foliage, rather than flowers, you'll have a longer-lasting effect with much less dead-heading. A few flowers are fun, but bold, spiky, sculptural, fuzzy and colorful leaves are the foundation of our plantings.

Plant in masses - groups of 3, 5, 12 or 25 strengthen a plant's impact, while simplifying both the garden's aesthetic and shortening your to-do list. Masses also allow you to shorten your plant list to include only the best of the best, without delving into less attractive, more needy plants.

Layers of foliage form, color and texture in this little courtyard garden capture attention year-round while keeping weeds at bay.

The nine month rule - if it doesn't look pretty darn good for nine months of the year, it's not worth it! Many plants put on an explosive floral show, and then peter out, leaving half a hole or clump of weedy foliage. One of the exceptions that prove this rule are lilies, which emerge through plants that will cover their fading foliage when they're done.

Think thick - Plant with the goal of creating waves of foliage that cover the ground to shade the plants' roots, save water and reduce weed issues. It may seem like more plants create more upkeep, but if you select your plants wisely and plant in masses, you'll have less work, not to mention a gorgeous, lush garden.

Weed more to weed less - Weed well every week or two, if you can manage it, or very thoroughly once a month through the growing season. In the long run, weeding once a week will take much less time than weeding once a month, because you will break the cycle of reseeding. If you wait much more than a month during the growing season, you're likely to have a bumper crop of the little devils for years to come. We once met someone who said it was impossible to control the weeds in his yard, even though "I go through it once a year on my hands and knees!"

Mulch! Mulching after planting and again every spring will kill or weaken weed seedlings, reduce water usage, insulate and feed the plants' roots and look great. Garden Compost from Lane Forest Products is our favorite mulch (and a great way to recycle!).

Last, but not least, have fun - If you do your homework and prep work, there should be time and room for a few fun, higher maintenance additions to your garden. Most of our plants need attention only once or twice a year, and their easy care leaves us time to deadhead a few dahlias and tidy the pea gravel.

A very easy, shady garden.

iBaltzer's Specialized Nursery

A dwarf Japanese maple from Baltzer's is a stunner in the Dobsons' garden.

Bob and Nancy Baltzer have a gorgeous, diverse selection of specimen Japanese maples and conifers. It's easy to spend hours in the rows of their lovely, cool Pleasant Hill nursery. When you finally emerge from studying one after another gorgeous maple, you will discover that the best part of the nursery is the owners' thoughtful advice and encyclopedic knowledge of their stock. If you find the perfect specimen for your garden, but don't have the room to get it home, delivery to the Eugene-Springfield area is available.

Baltzer's Nursery is open Friday, Saturday and Monday 9am-6pm and Sunday, 10am - 5pm. They are located on Highway 58, just outside of Pleasant Hill. For more information, call the nursery at (541) 747-5604.

Thanks for reading!

We hope you'll stay cool and find a little time to enjoy your garden this summer. We are looking forward to starting a couple of new projects and watching our clients' gardens grow. Keep an eye on the journal this month - there should be a few new pictures of our project at the coast and some more great ideas for your space.

water saving advice

It's hot! Or hot for Oregon, anyway.... As native Southerners (Suthnurs), we've seen hotter temperatures, but we still can't help but feel the heat of those first days above 90 degrees. The plants are feeling the heat, too, and on these warm summer afternoons, many of them look a little wilty or dry. Before you pull out the hose or turn up the irrigation, take a moment to read a few short and long term tips for reducing water usage. It's easy to water, and especially easy for experienced gardeners (ourselves very much included) to fall into old habits. Below are a few short and long term water-saving ideas. We welcome your ideas in the comments!

Buell watered his Austin, Texas garden once a month.  Photo from 2001

  1. Short-term: Don't water every wilty plant! Especially in the first hot days of the year, some plants wilt in the warm afternoons, but bounce right back when the temperatures drop.  Check the soil around dry looking plants for moisture - not just at the top, but feel around a couple inches below the surface.
  2. Short-term: Water at night or in the very early morning when humidity is high and evaporation rates are low.
  3. Short-term: Don't "set it and forget it." Irrigation systems can be a great part of reducing water usage, but it's very easy to set a schedule and not think about it again. Turn the cycle down or off in cooler periods and up in warmer periods, rather than setting it to water as often as "might" be needed.
  4. Long-term: Mulch at least once a year. Mulch feeds the plants as it breaks down, looks great, insulates roots and reduces evaporation from the soil. We love the Garden Compost from Lane Forest Products.
  5. Long-term: Plant for your desired watering schedule. One or two thirsty plants can mean that a whole bed of hardier plants get more water than they need. Buell reduced his Austin, Texas garden to a once-a-month (yes, month) watering schedule by letting his watering schedule guide his plantings, rather than the other way around.

There are lots more tips and ideas out there, but these are a few easy ideas that we revisit every summer.

Stay cool!

Newsletter #3

What a wonderful June! We've had perfect working weather, fun projects and a terrific garden tour. Thanks again to everyone who came out to support the Symphony Guild at the Music in the Garden event. We hope you had as much fun as we did! In this newsletter, we'll share the transformation of one of the trickiest spaces we've ever seen, offer a few ideas from the resulting garden, and give a summer reading list of five of our favorite garden books. Be sure to scroll through the main journal when you're done. In the last month, we've posted some great pictures, a guide to building simple and great looking tomato cages, a little about how we use metal in our designs and more.

i The Dobson Garden

Ted and Nancy Dobson are determined perfectionists. Everyone in their College Hill neighborhood watched with delight as they scraped, painted and pounded a neglected former rental house into an attractive home. Once the house met their exacting standards, they turned their attention to the yard, expecting to whip it into shape with substantially less effort and time than their house had taken. And then they called us....

Ted and Nancy Dobson's garden this spring.

All They Wanted Was a Container Garden

dobb42

In our initial consultation, Ted and Nancy requested an irrigated container garden in their small back yard. The problem was hiding the irrigation. Previous owners had finished the basement of the house and poured concrete over the entire flat space behind the house. A steep hillside required a tall, cinder block retaining wall. Add in narrow dimensions and a stellar view of the heat pump, and, as you can see below, the space was irrigation-proof and less than attractive.

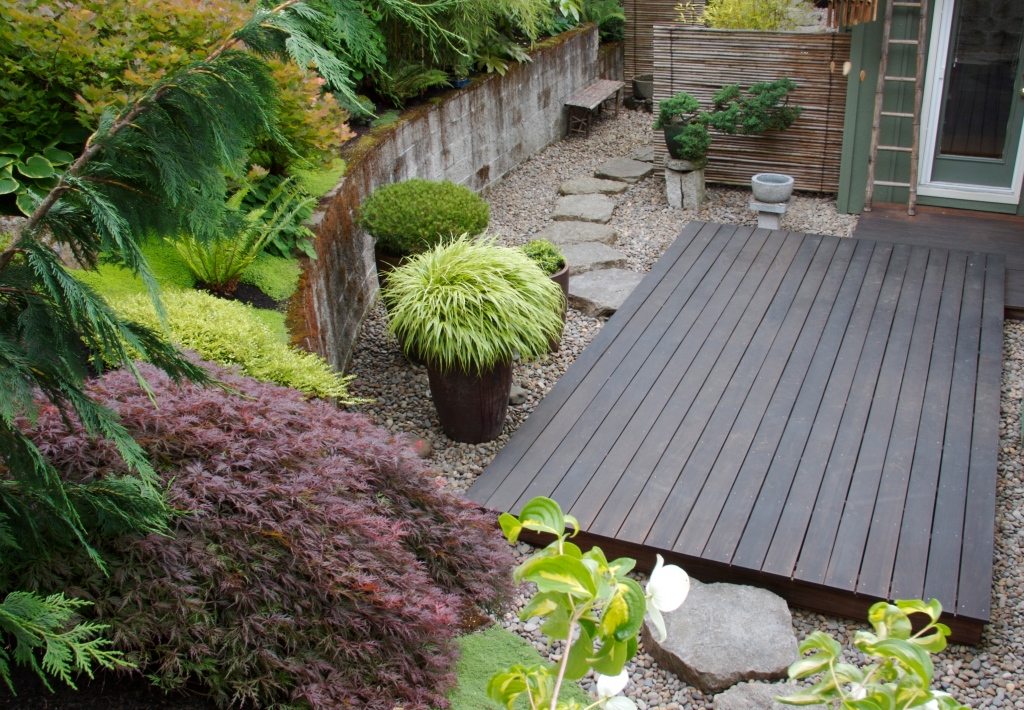
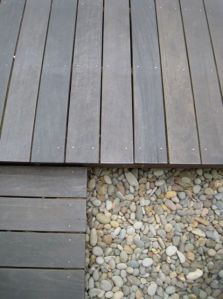
The contrast between dark, geometric wood and round river gravel strengthens the impact of both materials.

We used four main hardscape elements to create the Dobsons' garden: gravel, ipe (a sustainably forested hardwood) decking, stepping stones and bamboo screens. In a tiny space, everything needs a purpose, and each of these elements blends form and function. A large, local river gravel covers the concrete and irrigation while still allowing water to freely enter the drain system, but visitors only notice its cohesive, subtle texture. The ipe decks give the Dobsons a place to enjoy their garden, and its rich color and strong lines contrast with the lighter, more natural feeling of the stone elements. We borrowed the excellent Japanese concept of using large stepping stones as both a stable walking surface and a way of focusing attention on the journey, rather than the destination, thus keeping energy in the tiny garden. Finally, simple bamboo screens frame an enticing view between separate two garden rooms - the seating area and the pathway or journey garden - and, oh yeah, hide the heat pump from the seating area.

Our design surprised the Dobsons, who had expected a quick meeting about irrigation, but it captured their imaginations. We installed the hardscape of their garden in spring of 2006. At the time, they were casual gardeners, planting a few annuals here and there and keeping a very tidy lawn. However, something in their new space set their prodigious energies and curious minds to work, and they elected to plant the new garden themselves. In the intervening years, Ted and Nancy have created a thoughtful, Japanese-inspired planting, which meshes perfectly with their cool, quiet space.

The gardening didn't stop there, however. The front garden, which expands by the season, is a colorful contrast to the understated space in the back. Today, the Dobsons are regulars on garden tours and make long day trips to check out new nurseries. Every season finds them mulling over a new project and perfecting the existing plantings.

Bamboo screens frame an enticing view of the next room.

Three Ideas to Borrow

The Dobsons' tricky space is a terrific illustration of some of our core design concepts. Below are three ideas that can help turn a difficult space into an inviting garden.

Think big, even in a small space. Ample hardscape makes a tiny garden more welcoming. Approximately 2' wide stepping stones are an eye-catching invitation to stroll and the 8' x 14' ipe deck is a perfect spot for a glass of wine with friends.

Multitasking hardscape. Combining simple form with multiple functions keeps the garden cohesive and uncluttered. The Dobsons' bamboo screens frame the view of their path, separate the garden rooms, provide a striking backdrop for planted arrangements, and screen the heat pump.

Limitations as framework. More often than not, careful and creative thought can turn an apparent disadvantage into a guideline for great design. The concrete floor of the Dobsons' original "yard" is still under the layers of rich materials. What seemed at first like an unsightly, insurmountable obstacle became the inspiration for a terrific garden.

Summer Garden Reading

Here are five of our favorite garden design books for some summer inspiration. If you can't find them locally (I've seen several of these available used), we've linked to online sources.

The Modern Japanese Garden - This book by Michiko Rico Nose is as much a study in simplicity, honesty of materials and effective use of space as it is a review of contemporary Japanese gardens.

Breaking Ground - The first garden book we loved, and one to which we regularly return for inspiration. A thoughtful introduction to ten contemporary garden designers by Page Dickey.

Gardens in the Spirit of Place - Page Dickey explores gardens that look to the surrounding landscape and culture for their inspiration.

The Essential Garden Book - As close to a "how to" as you can get in garden design, by Terrance Conran.

In the Company of Stone - Daniel Stone is a master in the art and craft of stonework, and this beautiful book by Dan Snow should be on every rock geek's shelves.

Thanks for reading!

We're already brainstorming for the next newsletter. In the meantime, bookmark the journal and check back every few days. In the next month we'll share some process photos of the gorgeous, dry stack stone wall we're building, and, hopefully, some new portfolio shots. If you want to be the first to know about the newsletters and Mosaic news, join our mailing list! We write once or twice a month at most, and we'll never share your contact information.

Happy summer!

Rebecca & Buell

Mosaic's tomato cages

[Edit: Hi!  This page gets a lot of traffic, so we thought we'd make sure you knew about the rest of our journal and our other veggie-related posts.  We update regularly during the growing season and hope you'll check back in.  Thanks for stopping by!  Mosaic]

Our ornamental garden gets most of the questions on garden tours, but our take on tomato cages always catches the attention of dedicated veggie gardeners. These cages allow us to support a whole row of vigorous tomatoes at once and collapse into flat panels when not in use. Best of all, they are as sturdy, straight and good looking as the first time we used them six years ago!

IMG_0214
One of our tomato cages, ready for the summer

To make Mosaic's tomato cages, you'll need:

  • two strong galvanized welded wire panels (bull wire or some tough hog wire from the farm supply store is a great choice)
  • strong wire cutters or a grinder
  • 4 pieces of rebar (concrete reinforcing bar), with at least two pieces approx 5-6' long (depends on how deep you can drive them into your soil)
  • twine

First, cut your bull wire panels to size with the wire cutters or grinder. Our panels are the length of our veggie rows and about 4' high. We cut at least the bottom wire off the panels, so that the bottom vertical pieces form lots of little "stakes" to help secure the panels. We make sure that the ends of the panels are trimmed off, so no one can get caught or scraped.

Next, stick the panels in on either side of your tomatoes at an angle and then drive rebar into the soil, outside of the panels. Make sure the rebar is firmly in place, because it is the primary support for your structure and will hold everything together under high winds and heavy tomato loads. Tie the rebar securely to the panels with the twine.

Finally, string twine in a zig-zag pattern through the middle and top of the wire panels. These layers will help support the plants and fruit as they grow up through the cages.

At the end of the year, the cages are quick and easy to disassemble and store. We use a smaller version of these cages for peppers and eggplants and single panels of the same wire for climbing plants like peas and cucumbers.

Happy gardening!

Tomatoes overwhelming our cages on right.  Photo courtesy of Robin Bachtler Cushman.
Tomatoes overflowing our strong cages on right. Photo courtesy of Robin Bachtler Cushman.

Newsletter #2!

Welcome to our second newsletter! In this edition, we'll share how we select and place garden features and introduce one of our favorite nurseries - Dancing Oaks. If you haven't visited the journal since our last newsletter, we've added a few posts, including some inspiration for those of you who share your garden with deer. If you'd like for us to post more often, please tell your friends about our journal and leave a comment. The more visitors and feedback we have, the more we'll know we're on the right track!

[Edit, 5/28: Don't forget to visit the main page of our journal! We just posted some new photos, and there will be more photos and news to come.]

And... Save the Date!

We hope you will visit our garden on the Eugene Symphony Guild's Music in the Garden tour on Sunday, June 14. Advance tickets are available at most local nurseries. Stay tuned to the journal for more information on how you can support the Symphony Guild, see seven Eugene gardens and meet Mosaic.

iFocus on Features

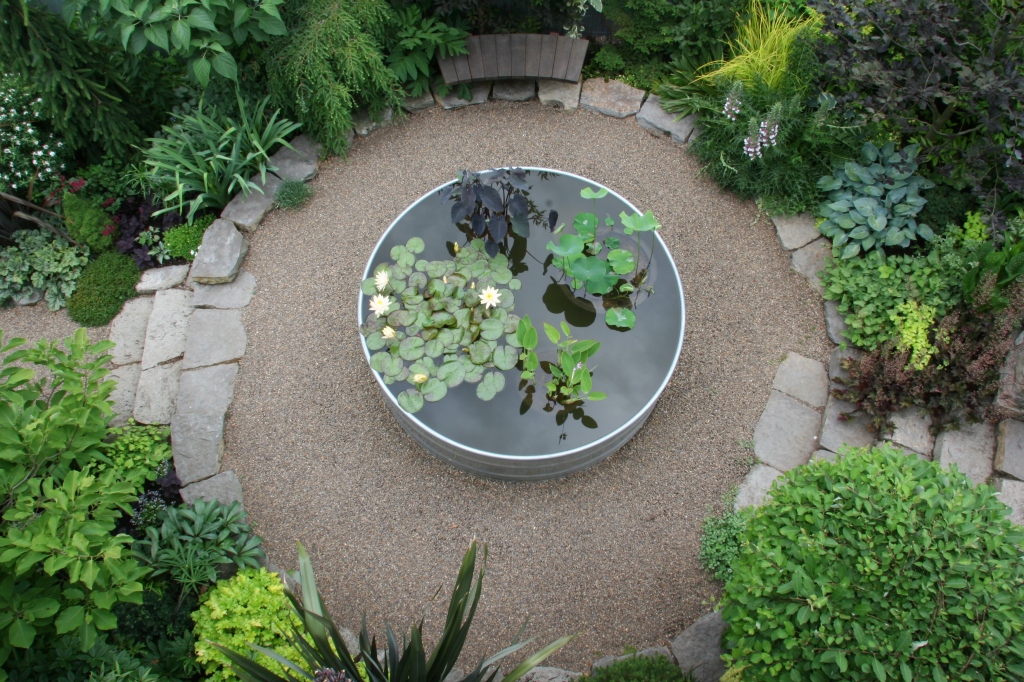
The stock tank pond from our roof, just above the living room window.

Location, location, location.

The first step in placing a feature is to consider the points from which it will be seen. If the feature can be seen from the house, primary windows and doors are a great place to start. Sometimes the view from the house trumps all other considerations. The pond in our garden, for instance, is centered on our large living room window. On our sloping lot, most of the garden falls below the windows, and we wanted a large, powerful feature to draw attention from the house into the garden. Once we'd selected the location of the 7' diameter stock tank, we designed the pathways and other hardscape around it.

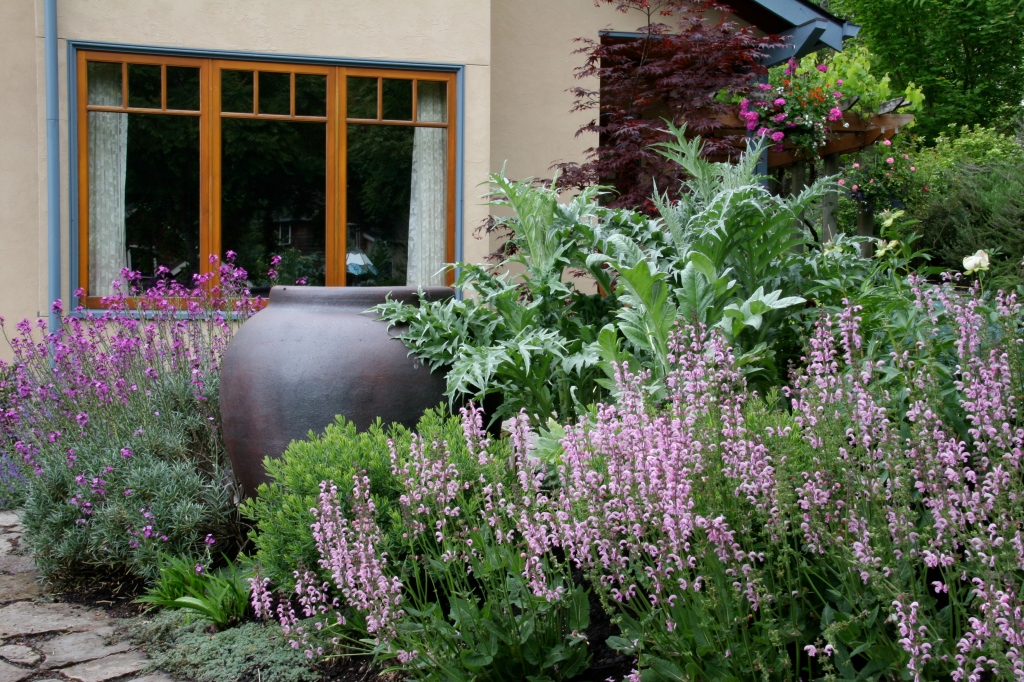
A front window frames the view of a feature and the surrounding garden.

Features can improve the house-garden connection in less structured spaces as well. A Vietnamese urn draws attention from the front window into the deer-friendly cottage garden. From another perspective, the basalt pathway splits, framing the view of the feature from below. Centering the feature on a primary garden path focuses attention and grounds the otherwise chaotic floral display.

d path

k

i

i

Think big!

Our number one rule of feature selection is more about substance than style. Even in small spaces, it's important to use features that draw attention from in and outside the garden. In the space below, a 48" tall Vietnamese urn stops the eye, where a smaller feature would not hold attention in the narrow space. Many of our features are 36" - 48" high and roughly as wide, and command attention in their carefully chosen locations.

Some features do double duty as furniture, screens or fire pits. A galvanized and powder-coated metal bench in the photo above anchors the other end of the rectangular gravel terrace. The sandstone bench we mentioned in the last newsletter is not tall, but its substantial form in combination with the backdrop of a rusting wall is a perfect, functional focal point.

While size is important, the design and feeling of a space may call for flexible thinking. If you don't want to stop the eye, a low, broad feature, like a pond, will encourage the viewer to look across and into the garden, rather than stopping their eye.

Simplicity works.

We believe that simple forms make the best features. In a classical or contemporary space, clean, unadorned forms dovetail with the geometry of their surroundings. In spaces that overflow with plants or lack a formal framework, visual complexity would be lost in the noise. Clean, quiet lines balance the surrounding chaos. We have designed several features, including a rusted metal fountain at the new Watershed building and several stacked stone sculptures. When left to our own devices, we always return to the simplest forms. Click on the images below for a closer look.

[gallery columns="4"]

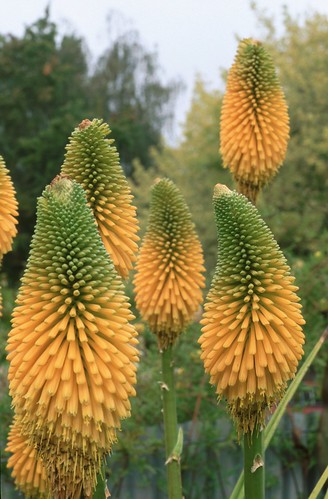
Dancing Oaks has the best Kniphofias!

iDancing Oaks!

Leonard Foltz and Fred Weisensee are plant geeks with a sense of style. They comb catalogs and continents to find the most stunning (and the most bizarre) foliage, blooms and form. The selection and diversity of plants at Dancing Oaks is unbelievable, if a bit dangerous. Some friends who took their compact car for the first visit had to return the next day with a truck! The nursery is northwest of Corvallis, and well worth the drive. Once you've seen the display garden, chatted with the kind and knowledgeable staff and filled a few nursery carts, you'll see what we mean. Dancing Oaks is open 9-5, Tuesday - Saturday or by appointment on other days. Please tell them Rebecca & Buell say hi! For more information, visit dancingoaks.com.

That's all for now,

but check back soon! It's photography season, and we will post some of Buell's 2009 shots soon. In the meantime, please share this journal with your friends and leave a comment if you have questions, requests or thoughts. And don't forget about the Music in the Garden tour on June 14....

If you'd like to make sure your garden project is on the calendar for this year, call 541.434.6467 to schedule a consultation. We look forward to talking with you!